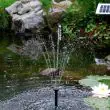
Great Solar Fountain
Great solar fountain. I do not have a pump in my pond and find that this is ideal for the hot days when the fish like to settle beneath the spray.
Brilliant
Ordered on Monday, arrived at lunchtime today, Wednesday, in pond by 2 p.m., worked straight away and still working at 8 this evening
Solar fountain
We have had our solar fountain for a few years now and it offered a welcome distraction whilst the world was locked down. Thoroughly recommend
The Best small solar fountain
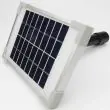
So glad i bought this Amorphous Silicone panel fountain for my waterfeature for it does work even when it's cloudy like today. And this has an added bonus of a battery back-up . It works!! Just need to play with the different spray heads. So chuffed.
Great value solar fountain!
Arrived swiftly. Easy to set up. Looks fab in my feature water container! Just Great!
A bit underpowered
Not as powerful a spray as we had hoped, maybe we should have had a larger pump. However, easy to put together, and it will keep the wildlife happy by oxygenating the pond
Still going
We bought this tiny solar fountain to use in our baby bath size pond. It worked really well last year, but needed the inlet filter cleaning often. Blanket weed,!!! Grrrr. We put the outfit away for the winter.
This year there was not such a problem. The pump worked immediately as soon as there was some sun, and as the pump works it seems to clear the water.
Brilliant little solar pump .
Small but Good
We have a very small pond next to a larger one with a mains fountain. Thought it would be a good idea to create some water movement and oxygenate the small pool. I didn't want the complication of mains wiring so solar power seemed the way to go. The SE 360 seems to be the perfect size and power for such a small pond. No danger of inadvertently emptying the pond and just the right amount of water movement. So far, so good and very pleased in the few days I've had it. Bigger ponds need very much more powerful pumps but this is right for our tiny water feature.
Solar Fountain Sunspray
Excellently product works really well and sets off my water barrel! Very easy to setup and is ideal for a small pond.
Everything I wanted from a solar pump
5* service from Powerbee. 5* product. Had a couple of floating fountains in the past. They never lasted and for the money, I could have had one of these. I now do. Bringing the kinetic water element back into the garden is a real pleasure during lockdown. Nath went above and beyond to ensure a speedy arrival. Many many thanks.
Good service
This is the second one of these I have bought. The first one worked brilliantly for 5 years, but unfortunately the battery back up started to let in the water so have just replaced the battery back.
Great quality and price
Works well. Tidy
Fantastic solar fountain
Having never had a water feature, wasn't really sure what I wanted for my small vintage wash tub water feature. Really thrilled with this pump as very easy to set up and it looks great. Received pump the very next day after ordering-great service from Powerbee.
Great!
This little fountain has been going for two years now and I am really pleased with it. On highest setting the fountain just touches edges of my little 2 feet diameter round pond. Great service from Powerbee as always.
Brilliant little fountain
Excellent 5* service from a great business. I emailed Nath with a question about the fountain and he responded quickly and helpfully. The fountain is excellent and easy to set up (I followed their very good YouTube video) . The battery backup means that the pump works well into the evening after the sun has set. I am thrilled and would not hesitate to buy from this business again.
very hard working little fountain
i bought this item when it was on special offer. at that time i didn't have a pond! however once hole was dug and plastic liner was full of water this item was set up and working. last august 2016 whilst on holiday i had an accident and was in hospital and respite care till 23 oct 2017. on returning home pond and fountain invisible due to being covered by long couch grass and various other shrubbery. once all this had been raked away this little fountain was still pumping away, but in raking process i lost the shower head. no prob cos i've ordered a nozzle set for a few pounds from powerbee. all in all - a sturdy little hardworker 5 star.
good solar power fountain
small compact neat reliable, not for winter so packed away now but great in summer
Good little fountain pump
We have a tiny little pond so didn’t want a fountain spray that was too powerful we opted for the battery backup version as we didn’t want an inconsistent spray considering the UK has quite a few clouds coming over we read the instructions and spoke to Nathan who said not to install pump too low, so we use the float and just put one extension tube on it works very well just the right size of pond is about 1 m long and it produces a nice little spray affect for the money this is an excellent little solar fountain and we are very happy, I would recommend this to anyone but obviously if you have a bigger pond then you will need more powerful pump but this is fine for small garden ponds
Good small Fountain
Had a small container and thought I would turn it in to a little fountain spray feature, its only 30 cms across so didnt want anything to powerful as it would shoot over the sides, bought the 360 and it is perfect, I have noticed in October that we get a lot less use, so will probably pack it away for winter time now, but operated all summer and it was a really consistent little pump would defo recommend
A really good quality kit
My wife and I were surprise at the quality of this, we have bought some others over the years with varied degrees of success but Powerbee's fountain is different, it does work very well, and the battery back up is a big bonus, as you can save the power, we have a small garden pond and its ideal, and the price is well worth it in my opinion.
Highly recommended.
Great Value, I Bought Two!
I am impressed with SE 360 fountain. I must admit that I bought it tongue in cheek as I have had some bad experiences in the past with solar powered fountains. The SE 360 is amazing. Parts of my garden are secluded and therefore do not get the full sun. I have two pools in totally different locations and was so impressed with the first fountain that I ordered a second one for the other pool.
These fountains come with a 5m lead so there is plenty of scope for positioning the solar panel. The connectors are "screw" not "push and twist" which makes a positive connection. I have had a fountain with "push and twist" connectors which failed I would suspect that the wire inside had fractured.
The battery back up hAS AN ON/OFF switch, my only complaint is that it is difficult to tell if this is on or off, but this is only a minor detail.
The product arrived when scheduled.
Excellent little solar pump
bought this solar fountain to put in my new half barrel as a bigger home for my goldfish who out grew his tank. The fountain arrived very quickly but unfortunately was broken in transit, I emailed PowerBee - they sent me a replacement immediately. Setting the fountain up was very easy - the solar panel is small but it works a treat even on overcast days. The cables are long so that you can position the panel in the best place for sun. I would definitely recommend PowerBee and this fountain and would certainly buy another one.
Great little fountain
This is a great little fountain for a small pond - really easy to assemble and works straight away. Bought it for my pond to keep the fish happy. The sound of trickling water is lovely, it's a bonus to know that it costs nothing to run.
this is a great solar pump
I have personally owned 5 * 360's and they are an incredibly good little solar fountain, very reliable and as long as you look after them they last years
Brilliant!
This is such good value, works brilliantly and really adds life to my mini pond. Now I'd really like another one for my other (shady) pond but with a longer lead to the solar panel please pretty please...
Great product
Made the mistake of ordering a similar product from a different solar company and had to send it back( very weak pump and battery would not charge).
Placed order with Powerbee,came the next day and hay presto, works like a dream!
My husband, Peter, can`t stop looking at it!
Thanks PowerBee.
Sunspray SE 360 Solar Pond Pump
This fountain seems to be well designed & constructed. It was easy to assemble & worked immediately when switched on. It was delivered very quickly & is excellent value for money. Technology has obviously moved on since I last bought a solar fountain 6 years ago!